Get Your RV Ready for the Road with These Essential RV De-Winterizing Steps
As the warmer months approach, it’s time to get your RV road-ready by properly de-winterizing it. Whether you’re a seasoned RV enthusiast or a first-time adventurer, following a thorough checklist will ensure your RV is in top shape for your next trip. From checking your propane system to inspecting your batteries, here’s a step-by-step guide to help you de-winterize your RV like a pro.
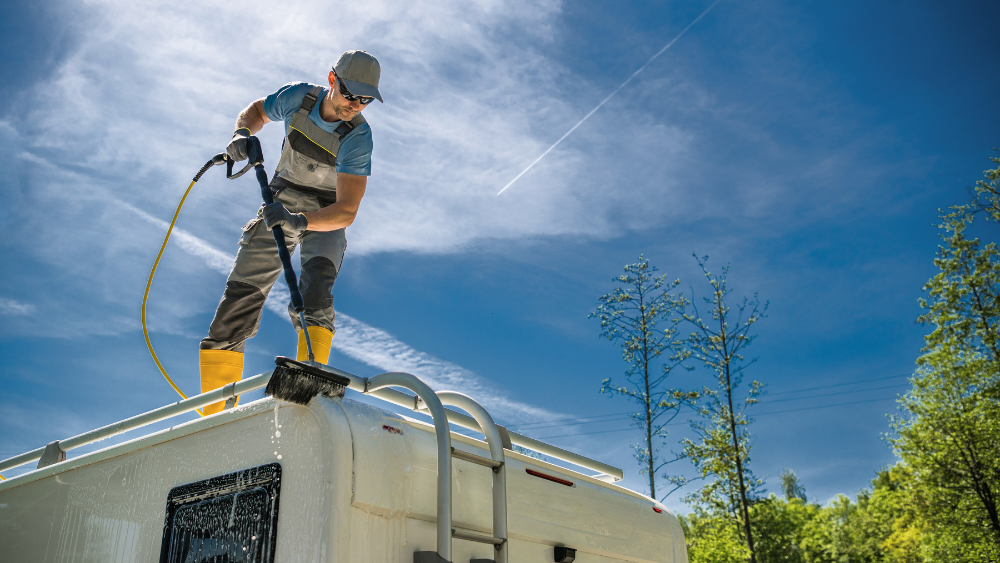
Step 1: Inspect the Exterior
Winter weather can be harsh on your RV’s exterior. Before hitting the road, thoroughly inspect the exterior for any damage that may have occurred during storage.
- Check for cracks, leaks, or damage on the roof, walls, and seams.
- Inspect seals around windows, doors, and vents.
- Remove any debris from the roof and clean it thoroughly.
- Open and close slide-outs to ensure they function properly.
Pro Tip: Consider applying a UV protectant to the exterior to prevent sun damage.
Step 2: Check Your Tires
Your tires may have lost pressure during the off-season, and it’s essential to ensure they are safe for travel.
- Check tire pressure and inflate to the manufacturer’s recommended PSI.
- Inspect tires for cracks, bulges, or uneven wear.
- Tighten lug nuts and ensure your spare tire is in good condition.
Pro Tip: Replace tires if they show signs of excessive wear or aging.
Step 3: Inspect and Reinstall the Battery
A battery left in storage can lose charge or become corroded.
- Inspect the battery for corrosion and clean terminals if needed.
- Fully charge the battery before reinstalling it.
- Test all electrical systems, including lights, outlets, and appliances.
Pro Tip: If your battery is over three years old, consider replacing it for optimal performance.
Step 4: Flush and Sanitize the Water System
To remove antifreeze and prepare your water system for safe use, follow these steps:
- Reconnect any water lines that were disconnected for winter storage.
- Fill the fresh water tank with clean water.
- Run water through each faucet and toilet until it runs clear.
- Sanitize the system by adding a mixture of water and RV-safe sanitizer.
- Flush the system thoroughly to remove any lingering antifreeze or contaminants.
Pro Tip: Don’t forget to check your water pump and water heater for proper operation.
Step 5: Check the Propane System
Ensuring your propane system is safe and functioning is crucial before your next trip.
- Inspect propane tanks for leaks using a soapy water solution.
- Test all propane appliances, including the stove, furnace, and refrigerator.
- Check regulators and hoses for wear or damage.
Pro Tip: Always have a certified technician inspect your propane system annually.
Step 6: Inspect the Interior
After months of storage, it’s important to check the interior of your RV for any issues.
- Look for signs of pests or mold and clean any affected areas.
- Test smoke and carbon monoxide detectors, replacing batteries if needed.
- Check all appliances and HVAC systems for proper function.
- Restock emergency kits and first aid supplies.
Pro Tip: Air out your RV to remove any musty odors and freshen up the space.
Step 7: Test the Plumbing and Electrical Systems
Before heading out, ensure that both plumbing and electrical systems are functioning correctly.
- Test outlets, lights, and appliances.
- Inspect hoses and connections for leaks.
- Ensure your generator is operational and fully fueled.
Pro Tip: Keep spare fuses and bulbs on hand for quick replacements.
Step 8: Restock Essentials
Now that your RV is in top shape, it’s time to stock up on supplies for your trip.
- Refill propane tanks and check fuel levels.
- Restock kitchen supplies, toiletries, and bedding.
- Ensure you have essential tools and spare parts for emergencies.
Pro Tip: Create a checklist to avoid forgetting any important items.
De-winterizing your RV properly will help ensure a stress-free and enjoyable adventure. By following this guide, you’ll be ready to hit the road with confidence.
If you need professional assistance and you’re in the Paso Robles, CA area, schedule a maintenance check with Delta RV, and we’ll make sure everything is in perfect working order!
For a visual guide on de-winterizing your RV, you may find this video helpful:
RV Dewinterization Basics for Beginners – Step-By-Step Process | John Marucci – Youtube
Sources:
How-To De-Winterize your RV | RVTrader.com
The Ultimate Guide To Dewinterizing Your RV | Camper Report
How to De-Winterize an RV or Camper: A Step-by-Step Guide | The Fun Outdoors